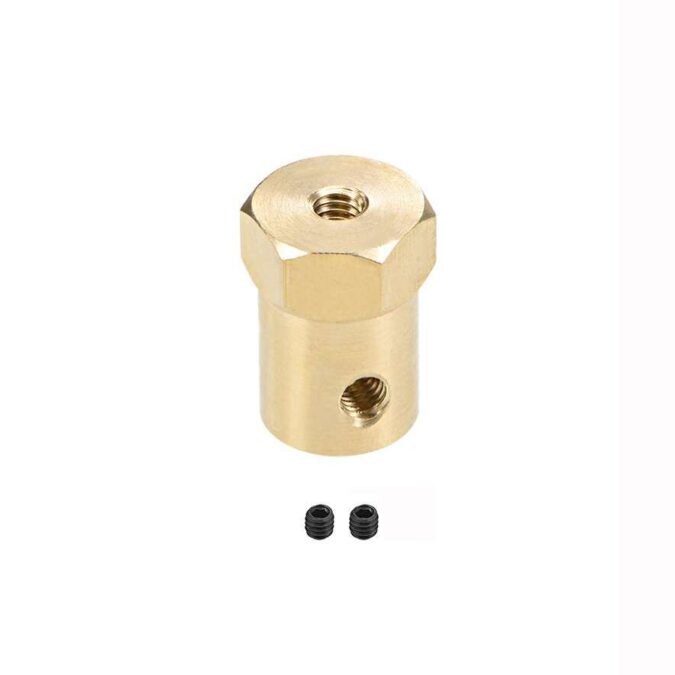
Whether it’s during the dog days of summer or at random times throughout the year, everyone enjoys ice cream. Taylor stands out for crafting top-notch ice cream machines and delivering delightful frozen treats swiftly. However, if your machine encounters a hiccup. We’ve got you covered with troubleshooting tips for Taylor soft serve machines. Keeping these machines in top shape is vital for businesses in the frozen treat industry. One common snag is the 034147 Hex Coupler Taylormate, a vital component responsible for transferring power from the motor to the dasher in Taylor ice cream machines. Don’t worry. This guide will handhold you through the seamless installation process, ensuring your machine churns out delicious treats without a hitch. With our step-by-step instructions, your Taylor ice cream machine will operate effortlessly, delighting customers with every scoop.
Preparation:
Before you start fixing your ice cream machine, it’s crucial to ensure the safety of both yourself and the equipment. First off, unplug the machine to avoid any electric shocks. Then, gather up all the tools you’ll need, like a set of wrenches, screwdrivers, and of course, the new hex coupler that matches your Taylor machine. It’s like getting ready for a small repair adventure! And remember, taking these precautions ensures smooth sailing during the maintenance process. So, let’s get started with fixing your ice cream maker.
Accessing the Hex Coupler:
Getting to the hex coupler might be a bit different depending on which Taylor ice cream machine you have. Usually, you’ll have to take off the outer panels or covers to reach the insides. Check out the user manual for more precise directions on how to get to the hex coupler for your particular model. Think of it like solving a puzzle once you figure out how to open up the machine, you’re one step closer to fixing it and getting back to making delicious ice cream.
Installing the New Hex Coupler:
When installing the new hex coupler, ensure it is positioned identically to the old one, aligning it precisely with the motor shaft and dasher. Confirm a secure fit without any gaps or misalignment, ensuring optimal performance. After proper alignment, securely fasten the hex coupler in place by reattaching the bolts or screws. Remember to tighten them adequately without excessive force to avoid damaging the components. This careful installation guarantees the smooth operation of your ice cream machine for many servings to come.
Removing the Old Hex Coupler:
After successfully reaching the hex coupler, proceed by selecting the suitable tools required to loosen and extract any bolts or screws fastening it securely. Pay close attention to the positioning of the coupler and its adjacent components to facilitate accurate reassembly later. Once the securing bolts are detached, the old hex coupler glides smoothly out from its designated spot. Take care during this step to avoid any damage to the surrounding machinery components. Remember, patience and precision ensure a smooth transition to the next phase of the maintenance process.
Reassembly and Testing:
After securely installing the new hex coupler, proceed to meticulously reassemble any previously removed panels or covers. Take extra care to ensure all components are aligned and fastened securely before reconnecting the ice cream machine to the power source. Once everything is in place, power up the machine and initiate a test cycle to confirm the proper functioning of the hex coupler. This crucial step ensures that power transmission is smooth and uninterrupted, guaranteeing the efficient operation of your ice cream machine.
Regular Maintenance:
Regular maintenance is key to extending the lifespan of the hex coupler and preventing future issues with your ice cream machine. Schedule regular inspections to check for signs of wear or damage on the hex coupler, as well as on surrounding components. Lubricate moving parts as recommended by the manufacturer to ensure smooth operation and minimise friction. Additionally, keep the area around the machine clean to prevent debris from entering and causing damage. Finally, train staff on proper usage and handling of the machine to reduce the risk of accidental damage. By incorporating these maintenance routines into your schedule, you can ensure optimal performance and longevity of your ice cream machine.
Conclusion:
Replacing the hex coupler in a Taylor ice cream machine is a straightforward process that can help extend the life of your equipment and ensure consistent performance. By following these step-by-step instructions, you can confidently install a new hex coupler and keep your ice cream machine running smoothly for years to come.
Also Read: https://usatimenetwork.com/


